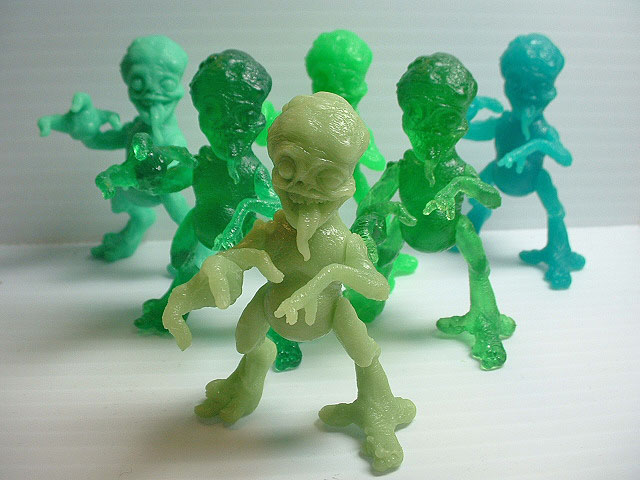
These guys are going fast, so head over to October Toys and get one! I got some castings and made some fun combinations on a glyos torso to show you the possibilities!
Hello, Sorry to comment here, but I didn't know how to contact you. How did you sculpt perfect squares and rectangles for the Clawshine figure? I'm looking for help on how to sculpt perfect squares or rectangles on the scale of Muscle (but not for Muscle). Thanks!
No problem Leitmotiv, sorry this answer comes so late, but I have been unbelievably busy and as you can see the answer is pretty complicated. The basic answer is to be careful and take your time. Ultimately you are the artist and you must find what works best for you and meets your quality standards, what works in the particular wax/clay/casteline you use, etc. Ultimately, each mark you make needs to be placed carefully and look consistent or be erased and tried again. No rushing. There were places where I used a grid screen, like a bug screen or what you would find in a screen door (look at a hardware store). Of course, you have to find a screen with squares exactly the right size! You lay this screen over the section and use a dull shaped tool, like a spoon shape, to press the screen evenly in. But mostly what you will need to do is by hand.
Imagine this is the edge of a "face" or "surface" on your sculpture where you want to put a grid: _________________ | | | | |________________ |
The example face is a rectangle, so it will naturally have more squares on the long side than the short side.
The key is to not think of individual squares, but think of making lines in parallel rows that will intersect each other making squares.. And before you make the rows, you're better off making little marks on the edge where you plan to make perfect lines across the surface, so you can keep the rows consistant and still fit perfectly on the edge (no leftover, partial squares {although it's worth noting some sunshine sculptures did have partial squares!}). decide how many squares you think should go down the side of the surface. If it is eight (an even number is easier), first make a hash mark in the perfect middle of the edge like this:
_________________ | | | | |_________;_________|
Then divide those: __________________ | | | | |____,_____;_____,____|
Then divide those: ____________________ | | | | |__,__,__,__:__,__,__,__|
And you have seven marks, dividing the side into eight parts. Now extend them out into lines:
Be VERY strict and accurate about keeping the gap between lines consistent. If you have a good eye you don't need to measure (measuring is hard to do at small scales anyway.)
Make rows going one way then make a second set of marks then lines going perpendicularly (90 degrees) to the first set, dividing it into squares: ___________________ |__|__|__|__|__|__|__|__| |__|__|__|__|__|__|__|__| |__|__|__|__|__|__|__|__| |__|__|__|__|__|__|__|__| |__|__|__|__|__|__|__|__|
WARNING: MAKE SURE WHEN YOU WRAP LINES ALL THE WAY AROUND THE SCULPT YOU ARE "AIMING" THE LINES TO MEET THEMSELVES! This was the most frustrating part by far, and made me have to erase whole sides of squares when I realized they wouldn't line up right with the other side.
Try to get used to the "stamping" style of sculpting to place your marks carefully and with perfect lines. If you try to use a "dragging" style with your tool you will push up an edge next to your lines and they are difficult to draw straight. Instead, don't draw them but stamp in a line with the perfectly straight edge of a tool, like the sharp or dull edge of an X-acto blade (depending on how thin or thick you want the line). Any tool you prefer can be used for this, as long as it has a straight edge and you press it in with minimal dragging.
Thanks for going into such depth about grids. It proved very helpful even though I have no need for grids on my sculptures (yet). I was needing more info on how to do the perfect looking cubes or blocks.
I was hoping to make a Creeper figure from Minecraft which uses shapes like these. Also the contact point for the leg to the torso will prove difficult because of the way the creature was designed. I may have to get creative.
Sorry I haven't responded to this sooner. I didn't realize you meant the general shape of the blocky body of the character. Unfortunately I basically hand sculpted that. You may be able to make the creeper shape out of blocks since he is made of such simple shapes. If you go to a hobby store you can get either styrene or wood in long rectangular rods that may be the right size, cut into sections.
If you want to sculpt it, I could advise you on how to improve sculpting smooth surfaces and edges. First off, you need to know how to make a smooth surface. A trick I learned from an automotive sculpting book before I was professional was to use an exacto blade (or any straight edge) and scrape the surface at a 90' angle, NEVER going in the same direction more than twice. Scrape scrape, new direction, scrape scrape, and this will eventually make a surface that is perfectly flat. Now if you want a cube or rectangular prism shape, the way I do it is honestly by eye-balling the measurements, but you need to make sure the appropriate sides are the same length. A cube, for instance, would be all same length edges. You can use a ruler if you wish. I would also eyeball the 90' angles that are necessary for the shapes of the creeper, but if you do not trust that you can use a ruler or something like a T square or a right angle ruler, probably again available at a hobby store or hardware store.
It occurs to me that you may benefit from printing out the papercraft plans for a creeper here: http://papercraft.robhack.com/various_finds/chhalo/Creeper.png at the size you want. You may just be happy with it in paper, but if you want it in clay, this printout can be very helpful. In fact, I think it may solve the most problems. Just print out the plans twice, once to make the thing in paper (as a guide for sculpting) and with the other one, cut each of the sides out into separate faces CAREFULLY and put them on the surface of your sculpture as guides.
I also noticed that he could be made easily out of wooden cubes from a hobby store if you make him at a large size. Each cube could be a pixel and then it would be easy to paint also.
Jason, Yeah that helps. The double scrape method will come in handy. I think I can eyeball the shapes of the rectangles/cubes. I have already made a few mockups in clay and the shapes are close, but not flat. So I think I'm halfway there, and I just need to implement your double scrape technique.
The Creeper is going to be made on a small scale, about the size of a Muscle figure. So the only question remaining for you (thank you again!) is how would you go about attaching cubes/rectangles to the body of the figure? Because the Creeper has joints that barely touch at all, and mathematically, probably don't. The contact points are slim to nothing at all!
That's a tough one. You have to strike a balance between accuracy and fragility (the more accurate you make it, the more likely it will break). If you are making many, like 50 or more (out of a mold), you may want to just thicken up that line that the cubes connect on (maybe bowing it out in the middle so the connection has a "belly", if that makes sense).
I have another idea that would take a little bit of assembly. If you connect the two sides with thin wire (buy some pins or needles), that would make a thin connection that would be sturdy. I'd connect it with 2 little sections of pin or needle so that it doesn't swivel. sculpt it that way and then (if you are molding it to make several) separate the sections and remove the pins so that you can mold each section with pin holes. Then when you have castings, get a little section of pin/needle and superglue it into one socket, and dab the exposed end with superglue and press the second piece into it. Hope that makes sense.


Hello, Sorry to comment here, but I didn't know how to contact you. How did you sculpt perfect squares and rectangles for the Clawshine figure? I'm looking for help on how to sculpt perfect squares or rectangles on the scale of Muscle (but not for Muscle). Thanks!
ReplyDeleteNo problem Leitmotiv, sorry this answer comes so late, but I have been unbelievably busy and as you can see the answer is pretty complicated.
ReplyDeleteThe basic answer is to be careful and take your time. Ultimately you are the artist and you must find what works best for you and meets your quality standards, what works in the particular wax/clay/casteline you use, etc. Ultimately, each mark you make needs to be placed carefully and look consistent or be erased and tried again. No rushing.
There were places where I used a grid screen, like a bug screen or what you would find in a screen door (look at a hardware store). Of course, you have to find a screen with squares exactly the right size! You lay this screen over the section and use a dull shaped tool, like a spoon shape, to press the screen evenly in. But mostly what you will need to do is by hand.
Imagine this is the edge of a "face" or "surface" on your sculpture where you want to put a grid:
ReplyDelete_________________
|
|
|
|
|________________ |
The example face is a rectangle, so it will naturally have more squares on the long side than the short side.
The key is to not think of individual squares, but think of making lines in parallel rows that will intersect each other making squares.. And before you make the rows, you're better off making little marks on the edge where you plan to make perfect lines across the surface, so you can keep the rows consistant and still fit perfectly on the edge (no leftover, partial squares {although it's worth noting some sunshine sculptures did have partial squares!}). decide how many squares you think should go down the side of the surface. If it is eight (an even number is easier), first make a hash mark in the perfect middle of the edge like this:
_________________
|
|
|
|
|_________;_________|
Then divide those:
__________________
|
|
|
|
|____,_____;_____,____|
Then divide those:
____________________
|
|
|
|
|__,__,__,__:__,__,__,__|
And you have seven marks, dividing the side into eight parts. Now extend them out into lines:
____________________
|
|
|
|
|__|__|__|__|__|__|__|__|
Be VERY strict and accurate about keeping the gap between lines consistent. If you have a good eye you don't need to measure (measuring is hard to do at small scales anyway.)
Make rows going one way then make a second set of marks then lines going perpendicularly (90 degrees) to the first set, dividing it into squares:
___________________
|__|__|__|__|__|__|__|__|
|__|__|__|__|__|__|__|__|
|__|__|__|__|__|__|__|__|
|__|__|__|__|__|__|__|__|
|__|__|__|__|__|__|__|__|
WARNING: MAKE SURE WHEN YOU WRAP LINES ALL THE WAY AROUND THE SCULPT YOU ARE "AIMING" THE LINES TO MEET THEMSELVES! This was the most frustrating part by far, and made me have to erase whole sides of squares when I realized they wouldn't line up right with the other side.
Try to get used to the "stamping" style of sculpting to place your marks carefully and with perfect lines. If you try to use a "dragging" style with your tool you will push up an edge next to your lines and they are difficult to draw straight. Instead, don't draw them but stamp in a line with the perfectly straight edge of a tool, like the sharp or dull edge of an X-acto blade (depending on how thin or thick you want the line). Any tool you prefer can be used for this, as long as it has a straight edge and you press it in with minimal dragging.
Hope this helps!
Jason
Thanks for going into such depth about grids. It proved very helpful even though I have no need for grids on my sculptures (yet). I was needing more info on how to do the perfect looking cubes or blocks.
ReplyDeleteI was hoping to make a Creeper figure from Minecraft which uses shapes like these. Also the contact point for the leg to the torso will prove difficult because of the way the creature was designed. I may have to get creative.
Any tips on making cube/block shapes?
Sorry I haven't responded to this sooner. I didn't realize you meant the general shape of the blocky body of the character. Unfortunately I basically hand sculpted that.
ReplyDeleteYou may be able to make the creeper shape out of blocks since he is made of such simple shapes. If you go to a hobby store you can get either styrene or wood in long rectangular rods that may be the right size, cut into sections.
If you want to sculpt it, I could advise you on how to improve sculpting smooth surfaces and edges. First off, you need to know how to make a smooth surface. A trick I learned from an automotive sculpting book before I was professional was to use an exacto blade (or any straight edge) and scrape the surface at a 90' angle, NEVER going in the same direction more than twice. Scrape scrape, new direction, scrape scrape, and this will eventually make a surface that is perfectly flat.
ReplyDeleteNow if you want a cube or rectangular prism shape, the way I do it is honestly by eye-balling the measurements, but you need to make sure the appropriate sides are the same length. A cube, for instance, would be all same length edges. You can use a ruler if you wish. I would also eyeball the 90' angles that are necessary for the shapes of the creeper, but if you do not trust that you can use a ruler or something like a T square or a right angle ruler, probably again available at a hobby store or hardware store.
It occurs to me that you may benefit from printing out the papercraft plans for a creeper here: http://papercraft.robhack.com/various_finds/chhalo/Creeper.png
at the size you want. You may just be happy with it in paper, but if you want it in clay, this printout can be very helpful. In fact, I think it may solve the most problems. Just print out the plans twice, once to make the thing in paper (as a guide for sculpting) and with the other one, cut each of the sides out into separate faces CAREFULLY and put them on the surface of your sculpture as guides.
I also noticed that he could be made easily out of wooden cubes from a hobby store if you make him at a large size. Each cube could be a pixel and then it would be easy to paint also.
Hope some of this helps!
Jason, Yeah that helps. The double scrape method will come in handy. I think I can eyeball the shapes of the rectangles/cubes. I have already made a few mockups in clay and the shapes are close, but not flat. So I think I'm halfway there, and I just need to implement your double scrape technique.
ReplyDeleteThe Creeper is going to be made on a small scale, about the size of a Muscle figure. So the only question remaining for you (thank you again!) is how would you go about attaching cubes/rectangles to the body of the figure? Because the Creeper has joints that barely touch at all, and mathematically, probably don't. The contact points are slim to nothing at all!
That's a tough one. You have to strike a balance between accuracy and fragility (the more accurate you make it, the more likely it will break). If you are making many, like 50 or more (out of a mold), you may want to just thicken up that line that the cubes connect on (maybe bowing it out in the middle so the connection has a "belly", if that makes sense).
ReplyDeleteI have another idea that would take a little bit of assembly. If you connect the two sides with thin wire (buy some pins or needles), that would make a thin connection that would be sturdy. I'd connect it with 2 little sections of pin or needle so that it doesn't swivel. sculpt it that way and then (if you are molding it to make several) separate the sections and remove the pins so that you can mold each section with pin holes. Then when you have castings, get a little section of pin/needle and superglue it into one socket, and dab the exposed end with superglue and press the second piece into it.
Hope that makes sense.